Code Signing for macOS

This article applies to macOS only.
See also: Multiplatform Programming Guide
Introduction
Code signing ensures both authenticity and integrity of executables that have been downloaded from wide area networks like the Internet. The discussion below applies equally to App Store distribution and distribution outside the App Store.
Code signing is required in iOS. On macOS 10.7 and later, it enables programs downloaded from the Internet to be opened without any warnings (if they are signed with an Apple-issued certificate) and it is required when using certain functionality (eg APIs used by debuggers; note that in this case a self-signed certificate that is marked as "trusted" suffices). This functionality is performed by Apple's Gatekeeper software.
The evolution of Gatekeeper
Gatekeeper, first introduced in Mountain Lion (10.8, 2012), is a Mac security feature that was designed to protect Apple computers from malicious software. Gatekeeper checks applications against the list of apps that Apple has approved for its App Store or have been code signed by developers who have Apple-issued certificates where the application is not offered through the app store. It does not perform any safety checks by itself, other than that the application wasn't changed since the developer signed it, nor does it offer any guarantees about the developer other than that they are paying Apple $US 99 per year (aka an "Identified Developer").
The original Gatekeeper options introduced in Mountain Lion, accessed from Preferences > Security and Privacy > General, were:
- App Store
- App Store and Identified Developers
- Anywhere
By choosing the Anywhere option, the user was once able to entirely disable Gatekeeper. The default setting only allowed the launching of applications from the App Store or from a developer who had signed their application with an Apple-issued certificate.
When macOS Sierra was released in 2016, Apple made some important changes to Gatekeeper and limited the the Gatekeeper options to:
- App Store
- App Store and Identified Developers
However, you could restore the missing Gatekeeper Anywhere' option in Preferences by opening a terminal and executing the command:
$ sudo spctl --master-disable
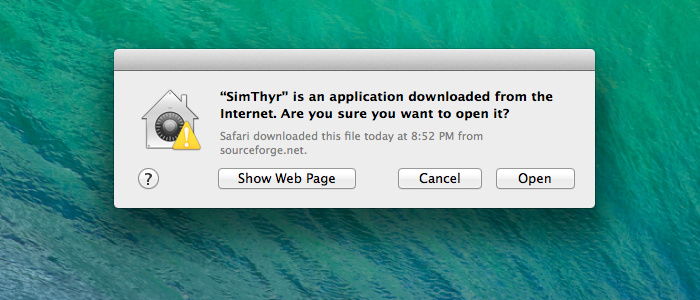
The better, as in more secure, alternative was to instead bypass Gatekeeper by opening the application from the right-click context menu or by control clicking on the application. This still triggered the alert dialog but it now contained an Open button to successfully launch the application. This method of bypassing Gatekeeper still works in macOS Catalina (2019).
Gatekeeper Dialogs
Simple warning after opening a downloaded application in Leopard.
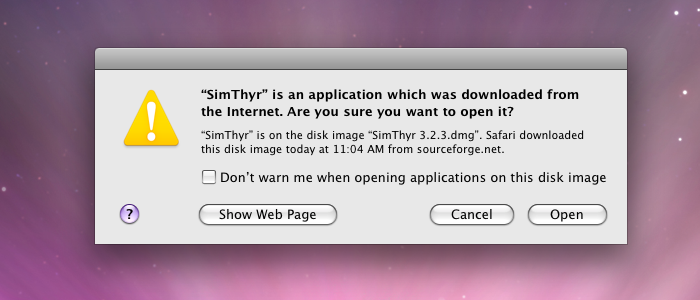
Default settings are more strict in Mavericks, where they prevent downloaded unsigned apps from being started via double-clicking.

If the application is launched via context menu in Mavericks a simple warning is displayed similar to that of earlier versions.
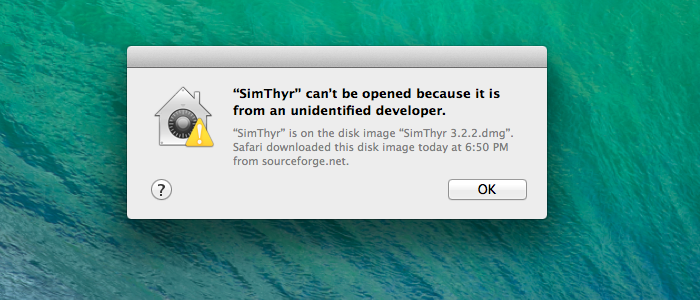
Gatekeeper shows a simplified warning, if a code-signed app has been downloaded and launched for the first time. In subsequent launches the program is starts immediately.

Overview of code-signing a program written with Lazarus and Free Pascal


Overview
The basic steps to sign an application that has been written with Lazarus and/or Free Pascal are:
- Obtain a Developer ID from Apple and install it in your system's key chain.
- Note the alphanumeric key of your Developer ID (aka TeamIdentifier).
- Sign your application with the codesign command.
- Sign your installer pkg with the productsign command.
It is not possible to use certificates from third-party providers like Comodo because they will not pass Gatekeeper which requires an Apple developer issued certificate. Also note that you cannot sign Windows applications with the Apple developer certificate (this time you do need a third-party Comodo etc certificate).
Using codesign to sign your application
1. Sign your application with:
codesign -f -o runtime --timestamp -s "Developer ID Application: YOUR NAME (TEAM_ID)" /path/to/bundle.app
2. Display basic information about the result of the signing process:
codesign -dv -r- /path/to/bundle.app
If your application was successfully signed this command will return information similar to this:
Executable=/Users/apple/Desktop/your.app/Contents/MacOS/yourappname
Identifier=org.yourdomain.yourappname
Format=app bundle with Mach-O thin (x86_64)
CodeDirectory v=20500 size=101470 flags=0x10000(runtime) hashes=3164+3 location=embedded
Signature size=9063
Timestamp=7 Dec 2019 at 18:36:08
Info.plist entries=16
TeamIdentifier=<10 alpha numeric digits>
Runtime Version=10.14.0
Sealed Resources version=2 rules=13 files=45
designated => identifier "org.yourdomain.yourappname" and anchor apple generic and certificate 1[field.1.2.840.113635.100.6.2.6] /* exists */ and certificate leaf[field.1.2.840.113635.100.6.1.13] /* exists */ and certificate leaf[subject.OU] = <10 alpha numeric digits>
3. Verify your signature:
codesign -vv /path/to/bundle.app
If your app was successfully signed this command will return the strings "valid on disk" and "satisfies its Designated Requirement", respectively, after the path to your application.
Using productsign to sign your pkg installer
1. Sign your installer pkg file with:
productsign --timestamp --sign "Developer ID Installer: YOUR NAME (TEAM_ID)" /path/to/unsigned.pkg /path/to/signed.pkg
2. Verify your signature with:
spctl -vv --assess --type install /path/to/your.pkg
which should yield information similar to this if it was successful:
your.pkg: accepted
source=Developer ID
origin=Developer ID Installer: YOUR NAME (<10 alpha numeric digits>)