LazReport Tutorial/es
Descripción
Esta página comenzó como una traducción de un escrito en Portugés Tutorial de LazReport (el cual a su vez parece una traducción de un documento en Francés). Fué actualizado para Lazreport (en vez de para FastReport) para Lazarus (en lugar de para Delphi), utilizando T*Connection en lugar de una tabla de DBase.
Comenzando con LazReport
Vamos a utilizar una base de datos de demo que provee Delphi (DBDEMOS). Necesitas crear una nueva aplicación con un formulario principal Form1.
Aquí se asume que se tiene la base de datos establecida tal como se especifica en SQLdb Tutorial0. En caso contrario, por favor realiza dicho paso primero.
Estableciendo tu formulario (form)
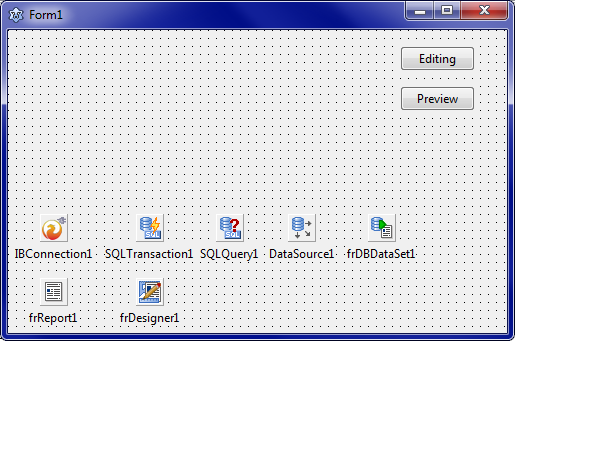
Sitúa los siguientes componentes en el formulario principal:
- Un T*Connection, e.g. TIBConnection:
- DatabaseName := tu base de datos, e.g. C:\Program Files\Firebird\Firebird_2_5\examples\empbuild\EMPLOYEE.FDB
- Nombre de usurio(UserName), contraseña (Password), nombre de equipo (HostName): apropiadamente (e.g. SYSDBA,password,<none> para Firebird embebido)
- Transaction: TSQLTransaction1
- TSQLTransaction
- TSQLQuery:
- Active: true
- SQL: SELECT * FROM employee
- TDataSource
- DataSource1.DataSet := SQLQuery1
- TfrDBDataSet
- frDbDataSet.DataSource := DataSource1
- TfrReport
- TfrDesigner
- 2 TButton
- Button1.Caption := 'Edición'
- Button2.Caption := 'Vista previa'
Esto dará el resultado siguiente:
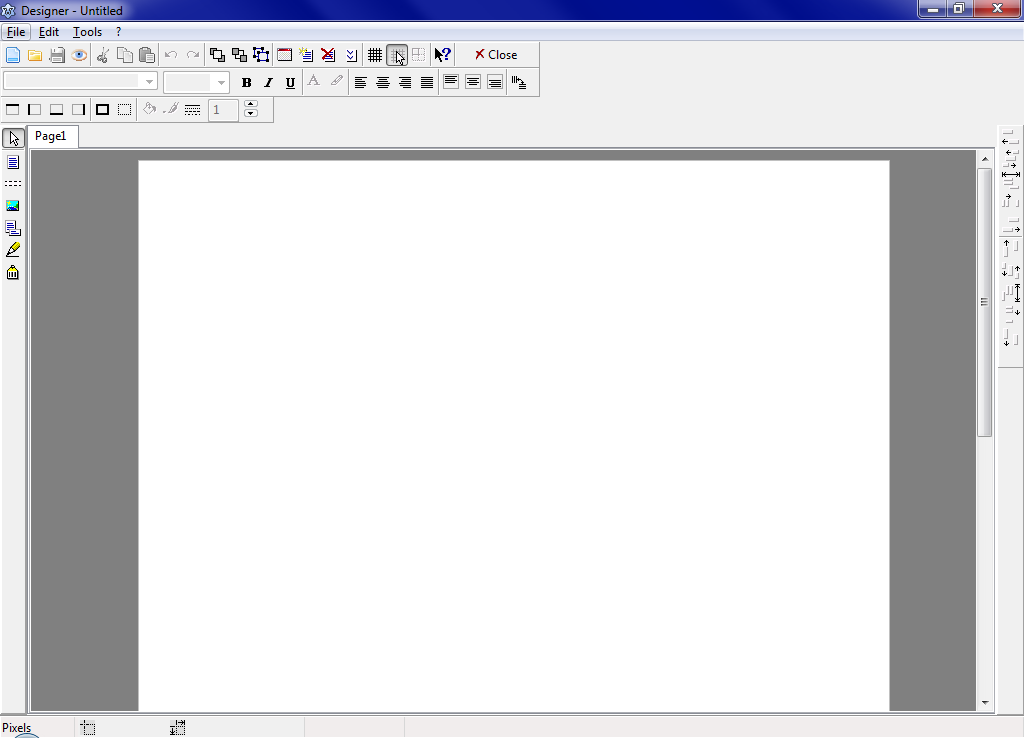
Haz Doble-click en el icono TfrReport (or right-click, Design Report) para traer al frente el diseñador de reportes:
Estableciendo variables
LazReport permite enlazar nombres de variables a bases de datos o valores del sistema, evitando así a los usuarios finales tener que descifrar nombres de campo crípticos. En nuestro ejemplo vamos a crear unas variables para nuestros campos de la base de datos FIRST_NAME, LAST_NAME etc.
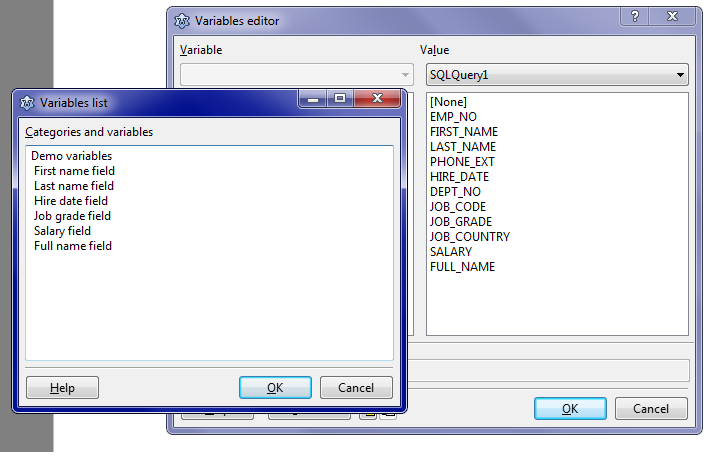
En el menú de ficheros, haz click en Variables list. Ahora se obtiene una descripción de las variables definidas:
Pulsa en el botón Variables en orden a definir algunas variables. Escribe el contenido de acuerdo a la siguiente imagen. "Demo Variables" representa una categoría y las otras entradas (campos xxx) representan variables. Para diferenciar ambas, las variables comienzan con un espacio.
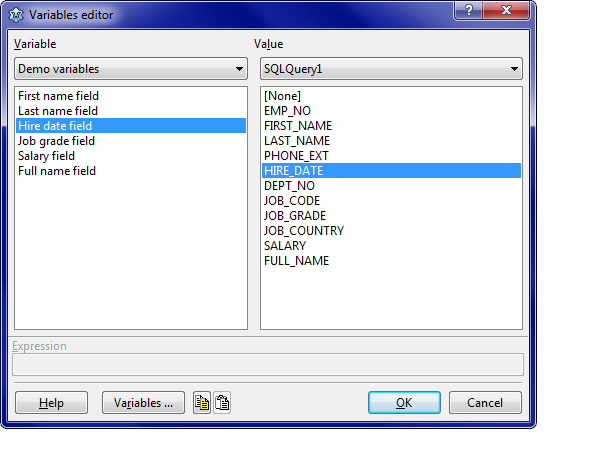
Finalmente haz click en OK para confirmar tus entradas, y entonces verás esto:
Como puedes ver, la categoría que hemos definido se muestra en el ComboBox above de las variables. Cada variable debe enlazarse con su campo correspondiente. Para hacer esto, selecciona la variable y a continuación el campo. Realizar esto para todas las variables; el pantallazo muestra el enlace para Hire date:
Objetos y bandas
Después de cerrar el editor de variables volvemos a nuestro diseñador de reporters. Habrás notado que aparece un pequeño número de objetos en la barra de la izquierda de la superficie de reporter. Estos son:
- El icono del puntero del ratón.
- El objeto rectángulo.
- Banda.
- Objeto picture.
- Subreport
- Dibujar líneas.
- Insertar objeto de código de barras (barcode).
Haz Click en el icono de banda, ve a la superficie del report y haz click en el para depositar el objeto banda.
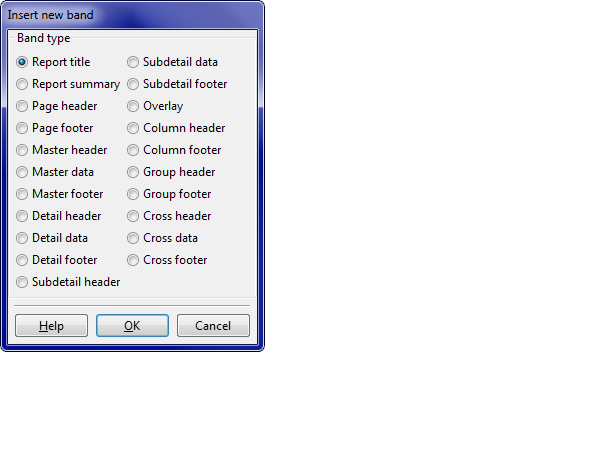
Debes hacer click en el tipo de banda que necesitas crear. Selecciona Report title y haz click en OK.
| Tipo de banda | Uso |
|---|---|
| Report title | Muestra solamente la primera página |
| Report summary | Mustra solamente la última página |
| Page header | Muestra al comienzo de cada página |
| Page footer | Muestra al final de cada página |
| Master header | Shown at the beginning of the first detail band/level |
| Master data | First detail level data; repeated for each record in dataset |
| Master footer | Shown at the end of the first detail band/level |
| Detail header | Shown at the beginning of the second detail band/level |
| Detail data | Second detail level data |
| Detail footer | Shown at the end of the second detail band/level |
| Subdetail header | Shown at the beginning of the third detail band/level |
| Subdetail data | Third detail level data |
| Subdetail footer | Shown at the end of the third detail band/level |
| Overlay | Shown once on each page lower layer |
| Column header | Muestra al principio de cada columna |
| Column footer | Muestra al fondo de cada columna |
| Group header | Shown at the top of every group |
| Group footer | Muestra al fondo de cada grupo |
| Cross header | Shown at the top of cross tables/pivot tables |
| Cross data | Shows cross tables/pivot table data |
| Cross footer | Shown at the bottom of cross tables/pivot tables |
Titulo del reporte
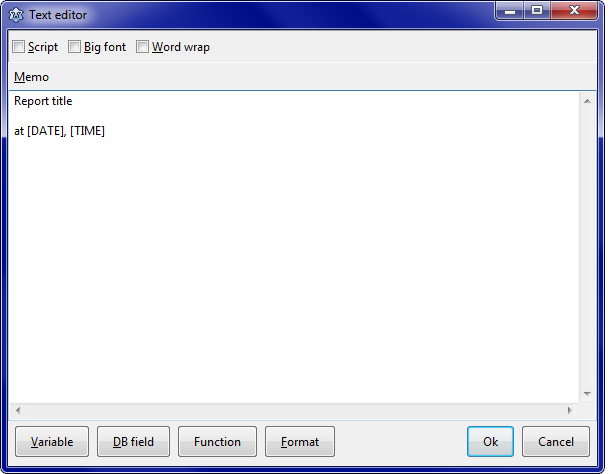
En la banda del editor de reportes, añade un rectángulo. Aparecerá el editor de texto. En la primera línea se debe indicar el título del reporte, añade un rectángulo.
En la segunda se necesita añadir la fecha y la hora. Ambas se obtienen haciendo click en Variable y a continuación en Category Other, seguido de un doble click en la variable deseada (una vez que te has familiarizado con las variables puedes también teclearlas). Ahora tenemos:
Haz Click en OK para salir del editor y a continuación ajusta el rectángulo del título al tamaño deseado. Escoge un color para el fondo con el pulsadorC Bucket Fill de la barra de utilidades.
El evento principal: mostrando datos en la banda de datos maestra
Vamos a insertar una banda de datos maestra. Lazreport pregunta por una fuente de datos; escoge frDBDataSet1, para nuestro ejemplo. La banda maestra se repetirá para cada registro de la fuente de datos. Puedes hacer doble click posteriormente en la banda si se necesita cambiar dicha fuente de datos.
En la mitad izquierda de la banda insertamos un rectángulo y hacemos un doble click. Aparece el editor de texto que ya nos resulta familiar.
Ahora vamos a añadir varios campos en un rectángulo. En caso necesario se puede utilizar un rectángulo por campo para aplicar diferentes formatos etc.
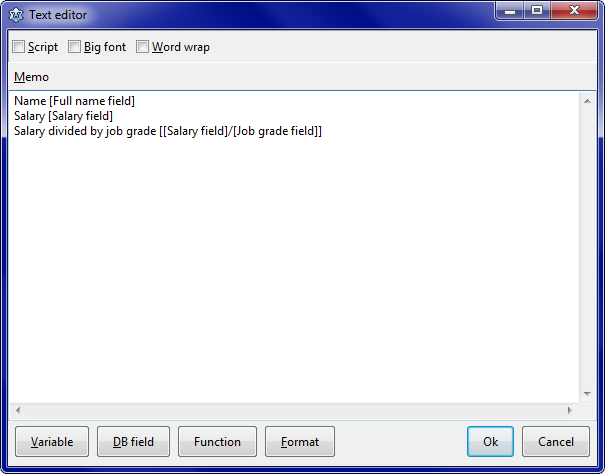
La primera línea Name [Full name field] se obtiene escribiendo Name y a continuación, con el pulsador Variable, entrar la variable [Field Name]. Alternativamente, tal como se indicó antes, se puede escribir directamente el texto resultante.
La siguiente línea Salary [Salary field] se escribe de manera similar.
La tercera línea - Salary divided by job grade [[Salary field]/[Job grade field]] - se realiza de igual modo. Esto muestra que se pueden realizar cálculos con los campos que tenemos en la fuente de datos. Fíjate en el conjunto extra de corchetes alrrededor del cálculo. Como puedes intuir, no solamente se pueden utilizar las variables listadas a través del pulsador Variable , sino también las de los campos de la base de datos a través de DB Field.
Puedes utilizar todo tipo de operadores y funciones en los cálculos; ver LazReport Documentation#Documentation para una descripción.
Formateando la salida
Se puede controlar el modo en que se muestra el texto en los rectángulos.
Añadamos primero un nuevo rectángulo con la variable Hire date field.
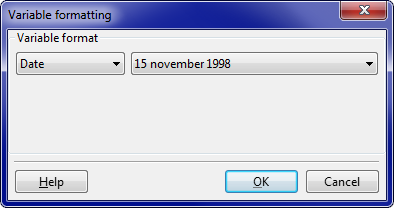
En el editor de variables vamos a establecer un formato. Un formato es válido para todas las variables de un rectángulo/objeto. Para mostrar el editor de formato, hacemos doble click en un rectángulo para obtener el editor de texto, a continuación hacemos click en el pulsador de formato Format.
Establezcamos el formato fecha (date) que se necesita aquí:
El primer ComboBox indica el tipo de dato (texto, numérico, fecha, hora, lógico/booleano). El segundo nos permite seleccionar el formato presenteThe second lets .... con algunas restricciones obvias:
- El tipo Texto no permite cualquier tipo de formato de número.
- El tipo número requiere un número decimal con una coma (Por favor verifica esto y ajusta el artículo si es necesario. ¿es esto específico del pais?). A excepción de para texto y tipos lógicos, se puede utiliar el mismo tipo de formato de cadenas que se utilizan en Lazarus.
Otras opciones de formato se encuentran presentes en el pulsador debajo del menú (e.g (e.g. negrita (bold), italica (italic), resaltada (Highlighting) ).
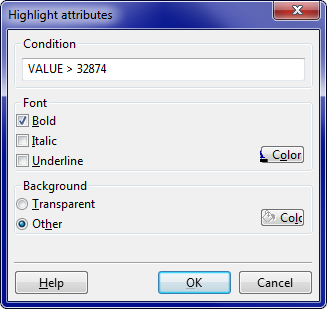
El formato resaltado (Highlighting) resulta muy útil para enfatizar datos. Se puede especificar una condición que determine cuando se aplica dicho resaltado.
Para ello, utiliza el valor del keyword para indicar el valor de la variable. Aquí es el resaltado para all hire dates posteriores a 1989. Debido a que Hire date es un campo TDateTime (el cual es internamente un float), I cheated por utilizar el valor tipo flot de January 1st, 1990 el cual es 32874. Por defecto highlighter es simplemente el formato negrita sobre fondo blanco. Se pueden establecer estos parámetros para un área haciendo click en el pulsador de Highlight.
Una imagen es mejor que ...
Si no lo has hecho todavía, necesitaremos añadir un campo PHOTO a nuestro test de bases de datos; utilizando una sentencia SQL como esta (nota: desafortunadamente las distintas bases de datos utilizan sintaxis diferentes; BLOB puede ser CLOB,IMAGE,OLE...):
ALTER TABLE EMPLOYEE ADD PHOTO BLOB;Ahora añadamos algún test de datos - este ejemplo utiliza ficheros jpg - dentro del campo PHOTO por media de tu herramienta de bases de datos favorita. Nota: este es el modo en que trabaja DBImage de Delphi: justamente blobs binarios con datos de imagen. Por defecto Lazarus DBImage es más flexible y almacena la extensión del fichero antes de los datos de la imagen, permitiendo utilizar diferentes formatos de fichero. En aras de la simplicidad utilizaremos la modalidad de Delphi.
Nota: para trabajar con esto "DBImage BLOB sin información de la extensión de fichero" , necesitarás el patch a la incidencia 25453/al menos la revisión ... de LazReport
Ahora debemos indicar al reporte que debe tratar todos los datos de imagen como ficheros binarios en formato jpg. Haz Click en frReport1, ve al inspector de objetos, eventos, y comienza un procedimienton OnDBImageReader:
procedure TForm1.frReport1DBImageRead(Sender: TObject; S: TStream;
  var GraphExt: string);
begin
  // Force TDBImage to Delphi compatible behaviour: only accept a single file type, e.g. jpg
  // this means that the BLOBs in your database must be just jpg binary files without any other data
  GraphExt:='jpg';
end;
In File>Variables List, add the SQLQuery1.PHOTO field as variable Photo field, similarly to how you did this before. If you don't see the field, you may need to set the form's SQLQuery to inactive and active again to refresh the list of columns.
Click on the Insert image... icon on the left of the window; now click on the right side of the band to drop the image control. A Picture editor shows up:
If you wanted to always show the same picture, you'd just need to click Load ... (or double click on the picture control) and choose your image.
However, let's press the Memo button and insert your Photo variable:
This turns the picture into an object associated with the data field. Press OK as needed to get back to the report designer.
Adjust height and width as needed.
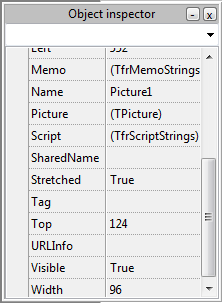
You can also press F11 to show the Object Inspector which allows you to edit more if needed:
Close the report editor and save the report definition (with the same name, lazreporttutorial.lrf).
If you go to File>Preview, you'll see your report includes the images.
Close the report editor and save the report definition as lazreporttutorial.lrf.
Detail data
To do: show how to use the detail part of master/detail. see e.g. sample in components/lazreport/samples/editor directory; see the button title "Master-Detail" Please write me.
Loading the report from the form
Now let's write the code required to load and view or edit our report. To this add the following code to the project:
TForm1.Button2Click(Sender procedure: TObject);
begin
  frReport1.LoadFromFile('lazreporttutorial.lrf');
  frReport1.ShowReport;
end;
TForm1.ButtonClick(Sender procedure: TObject);
begin
  frReport1.LoadFromFile('lazreporttutorial.lrf');
  frReport1.DesignReport;
end;
You have a preview option that gives end users a way to modify the report without changing the basic application.
Printing
Now we're going to add features to our basic example.
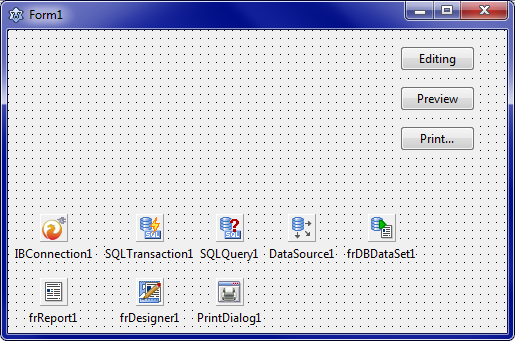
Add a TButton component with Caption := 'Print...', and a TPrintDialog. Behind the scenes, a project dependency on the Printer4Lazarus packages will be added by the IDE, so make sure that package is installed.
We end up with this:
Now add the printers unit to your form's uses clauses.
Put the following code in the OnClick event of the Print button:
procedure TForm1.Button3Click(Sender: TObject);
var
  FromPage, ToPage, NumberCopies: Integer;
  ind: Integer;
  Collap: Boolean;
begin
  // Load report definition from application directory
  AppDirectory:=ExtractFilePath(ParamStr(0));
  frReport1.LoadFromFile('lazreporttutorial.lrf');
  // Need to keep track of which printer was originally selected to check for user changes
  ind:= Printer.PrinterIndex;
  // Prepare the report and just stop if we hit an error as continuing makes no sense
  if not frReport1.PrepareReport then Exit;
  // Set up dialog with some sensible defaults which user can change
  with PrintDialog1 do
  begin
    Options:=[poPageNums ]; // allows selecting pages/page numbers
    Copies:=1;
    Collate:=true; // ordened copies
    FromPage:=1; // start page
    ToPage:=frReport1.EMFPages.Count; // last page
    MaxPage:=frReport1.EMFPages.Count; // maximum allowed number of pages
    if Execute then // show dialog; if succesful, process user feedback
    begin
      if (Printer.PrinterIndex <> ind ) // verify if selected printer has changed
        or frReport1.CanRebuild // ... only makes sense if we can reformat the report
        or frReport1.ChangePrinter(ind, Printer.PrinterIndex) //... then change printer
        then
        frReport1.PrepareReport //... and reformat for new printer
      else
        exit; // we couldn't honour the printer change

      if PrintDialog1.PrintRange = prPageNums then // user made page range selection
      begin
        FromPage:=PrintDialog1.FromPage; // first page
        ToPage:=PrintDialog1.ToPage;  // last page
      end;
      NumberCopies:=PrintDialog1.Copies; // number of copies
      // Print the report using the supplied pages & copies
      frReport1.PrintPreparedReport(inttostr(FromPage)+'-'+inttostr(ToPage), NumberCopies);
    end;
  end;
end;
It's a bit long, but if needed, you can create a descendant of TfrReport with an easier printing method or class , create a PrintReport (Report: string) procedure to load the report and print.
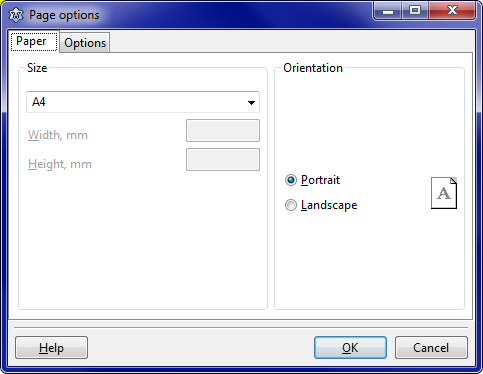
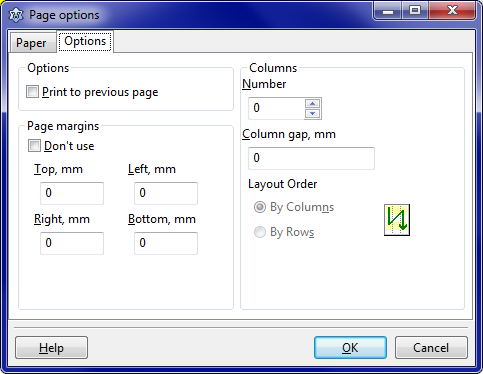
When double clicking on frReport1, in the report designer File>Page Options menu you get this:
Select paper size:
Choose desired margins, number of columns, and the space between them, layout order etc.
Report options
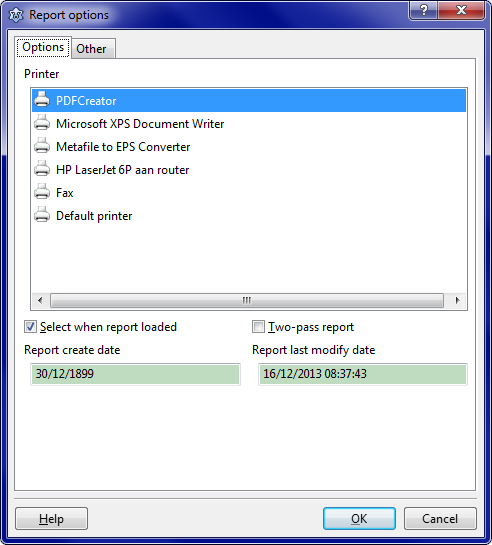
Via File>Report Options you can set a default printer that will be used for the report (using the "Select when report loaded" checkbox).
If you want to include the total number of pages with the page number on each page, you need to select Two-pass report (which tells Lazreport to build the report twice, inserting total number of pages on the second run).
On the Other tab, you can fill out some report metadata, as is done on the screenshot below:

General purpose variables
Now we'll add some report variables unrelated to the database data in our example. They let you e.g. show different names according to the context.
To do this, open the report editor and select the File menu and the Variable List. Add a Test category, and a test1 variable the same way we did earlier (with a space before the variable name):
The only difference is that you will not select a value field, but leave None (the default value):

Return to Lazarus (do not forget to save your report, if necessary) and set up the OnGetValue event of the frReport1' component by adding the following code:
procedure TForm1.frReport1GetValue(const ParName: String; var ParValue: Variant
  );
begin
 // Conditionally assign value:
 if UpperCase(ParName)=' TEST' then
   ParValue:='Answer: Variable "test1"'; //perhaps replace with a call to a random function or something?
end;
Please verify this and adjust article if needed: should the test for ParName really be (category) TEST and not TEST1? Also, don't we need to add a rectangle somewhere and show variable test1?
Alternatively, you can also pass the value directly to the variable using the following code:
procedure TForm1.Button1Click(Sender:TObject);
begin
  frReport1.Values.FindVariable('test').Field := QuotedStr('test1');
  frReport1.ShowReport;
end;